
There are a few interesting acronyms these days to build up your cloud environment – DevOps, CD, CI and many others. These came from the world where automation is the key throughout the release cycle of the application. With blog post herewith we will start the series of articles to help you to build up your own cloud environment to host your applications and support continuous delivery, -integration and DevOps.
The platform
We are not going to go through the meaning and approach of CD/CI in here, there are plenty of materials available on the web. You can start reading about that from here or here. One of the keys to building up such approach is to have a proper platform. With this article, we will build up Kubernetes container platform with Rancher.
Lets begin – what we need
Firstly we need one VM that will run Rancher. For sake of simplicity we will build single server setup for now. If needed, the solution can be expanded later on. I will use one server with following parameters:
- 2 vCPU
- 2GB of RAM
- 40GB of disk
- Ubuntu 18.04LTS
We also need few nodes to form a Kubernetes cluster. These usually
For Rancher installation we need also Docker installed to our Rancher system. Also our cluster nodes will need to have Docker installed. To install Docker:
$ sudo apt-get update
$ sudo apt-get install docker.io
It would be good to have also a domain and DNS record available for the host, as we will do Rancher installation for SSL access.
Install Rancher
To install Rancher, we have few options. For now we will go for single host install and we would like to have Lets Encrypt SSL certificate installed there for secured HTTPS connection. Deployment will be in container. The command we run is:
$ sudo docker run -d --restart=unless-stopped -p 80:80 -p 443:443 -v /data/rancher:/var/lib/rancher rancher/rancher:latest --acme-domain <YOUR.DNS.NAME>You might want to run the command with administrative privileges using sudo in a beginning of command. The command runs Docker in detached mode (-d), so it will keep running even if you will logout from your session. We also want to have container restarted, unless we stop it by ourselves (--restart=unless-stopped). With a command the port 80 will be mapped to access, because we need to update Lets Encrypt certificates and 443 will be open to access Rancher console over SSL. To keep Rancher information available also when container is not running, we would need to define a volume to store Rancher information. We use /data/rancher for the volume. We will use latest Rancher image rancher/rancher:latest. And lastly we tell to LetsEncrypt to have certificate for our domain with a flag --acme-domain <YOUR.DNS.NAME>. For <YOUR.DNS.NAME>, you need to use the name described in requirements, the one which was registered in DNS.
Once done, you can point your browser to your rancher host now and you will get to first login screen as seen below.
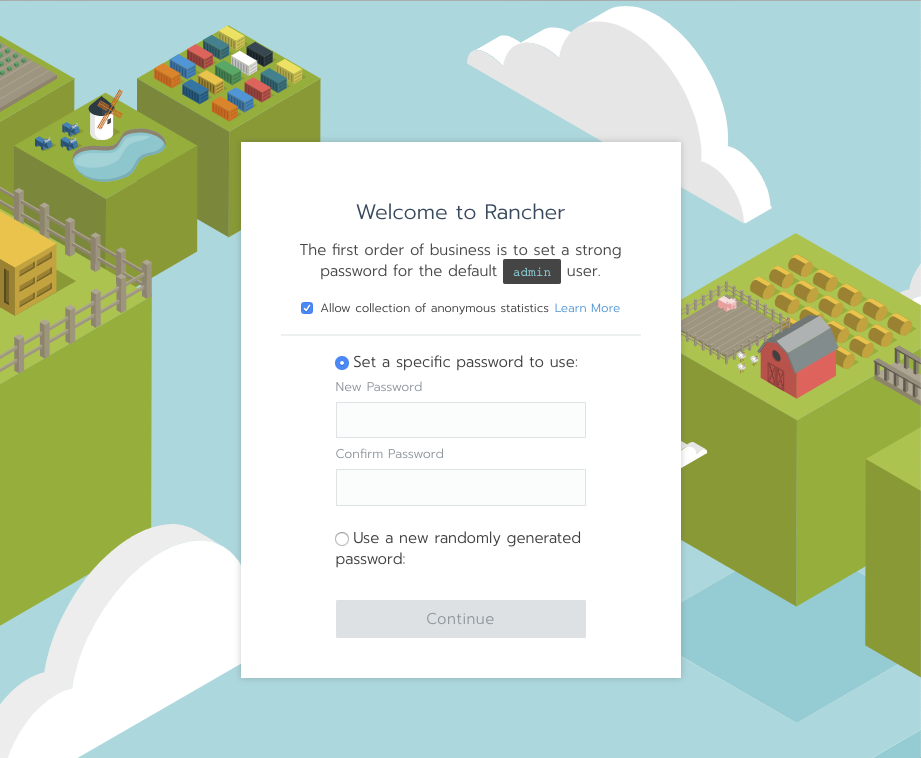
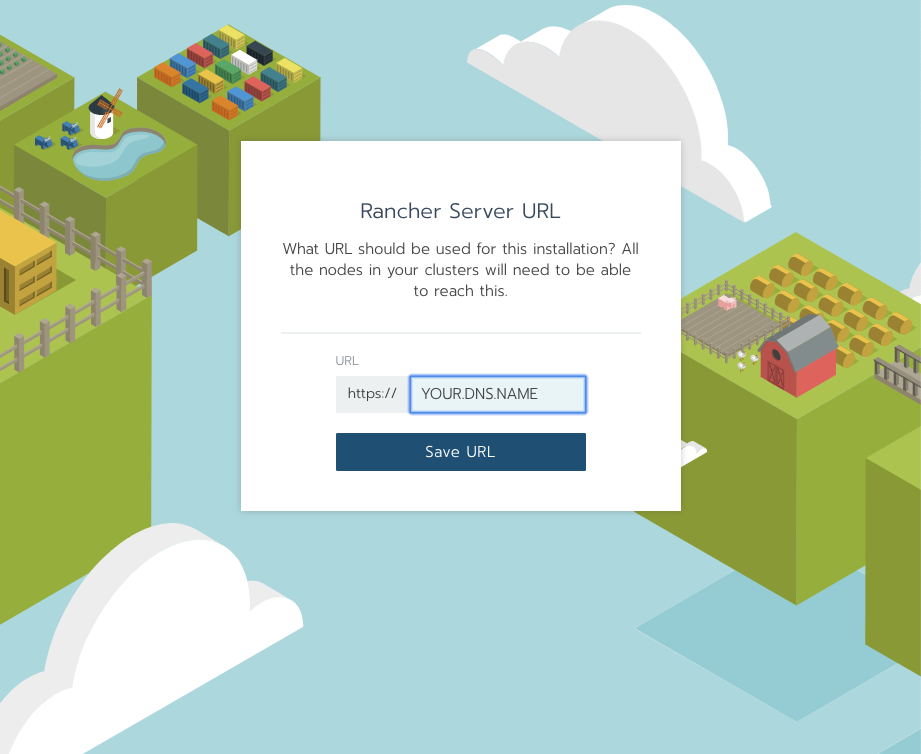
You need to create password for first login. Then you will be asked to save domain name, where you should have domain name described earlier in docker run command.
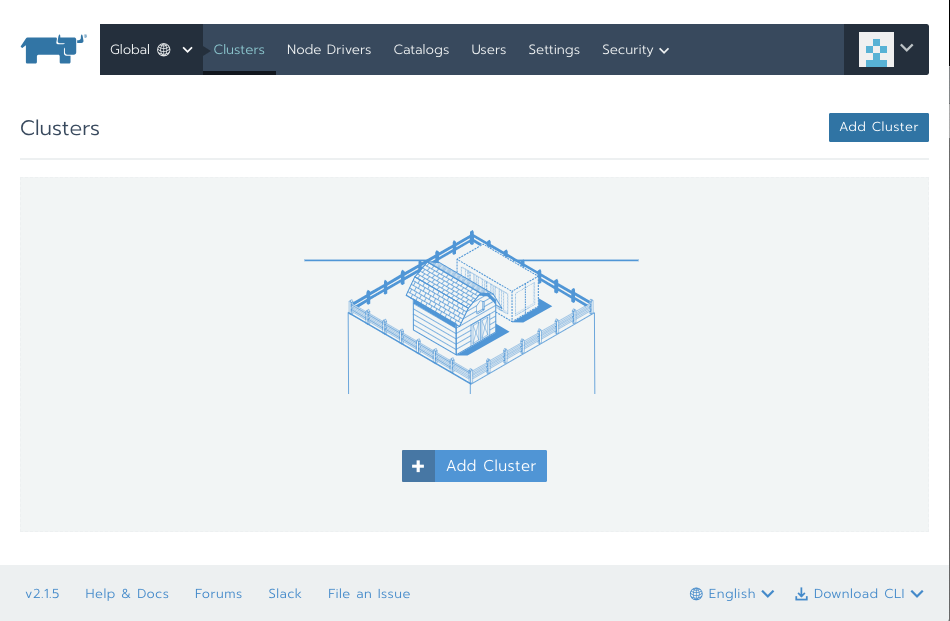
Now, since you have your Rancher server up and running you can start to set up your Kubernetes clusters. So your final screen should be something similar to below here:
Deploy Kubernetes cluster with Rancher
For deployment of Kubernetes cluster we need our cluster hosts. Since I have all nodes in single environment, I use internal private network IP addresses to build up the cluster. I have nodes prepared with OS and Docker to run as Kubernetes cluster nodes. Just take a note of the external, public IP addresses too from PILW.IO portal, as we run some services externally.
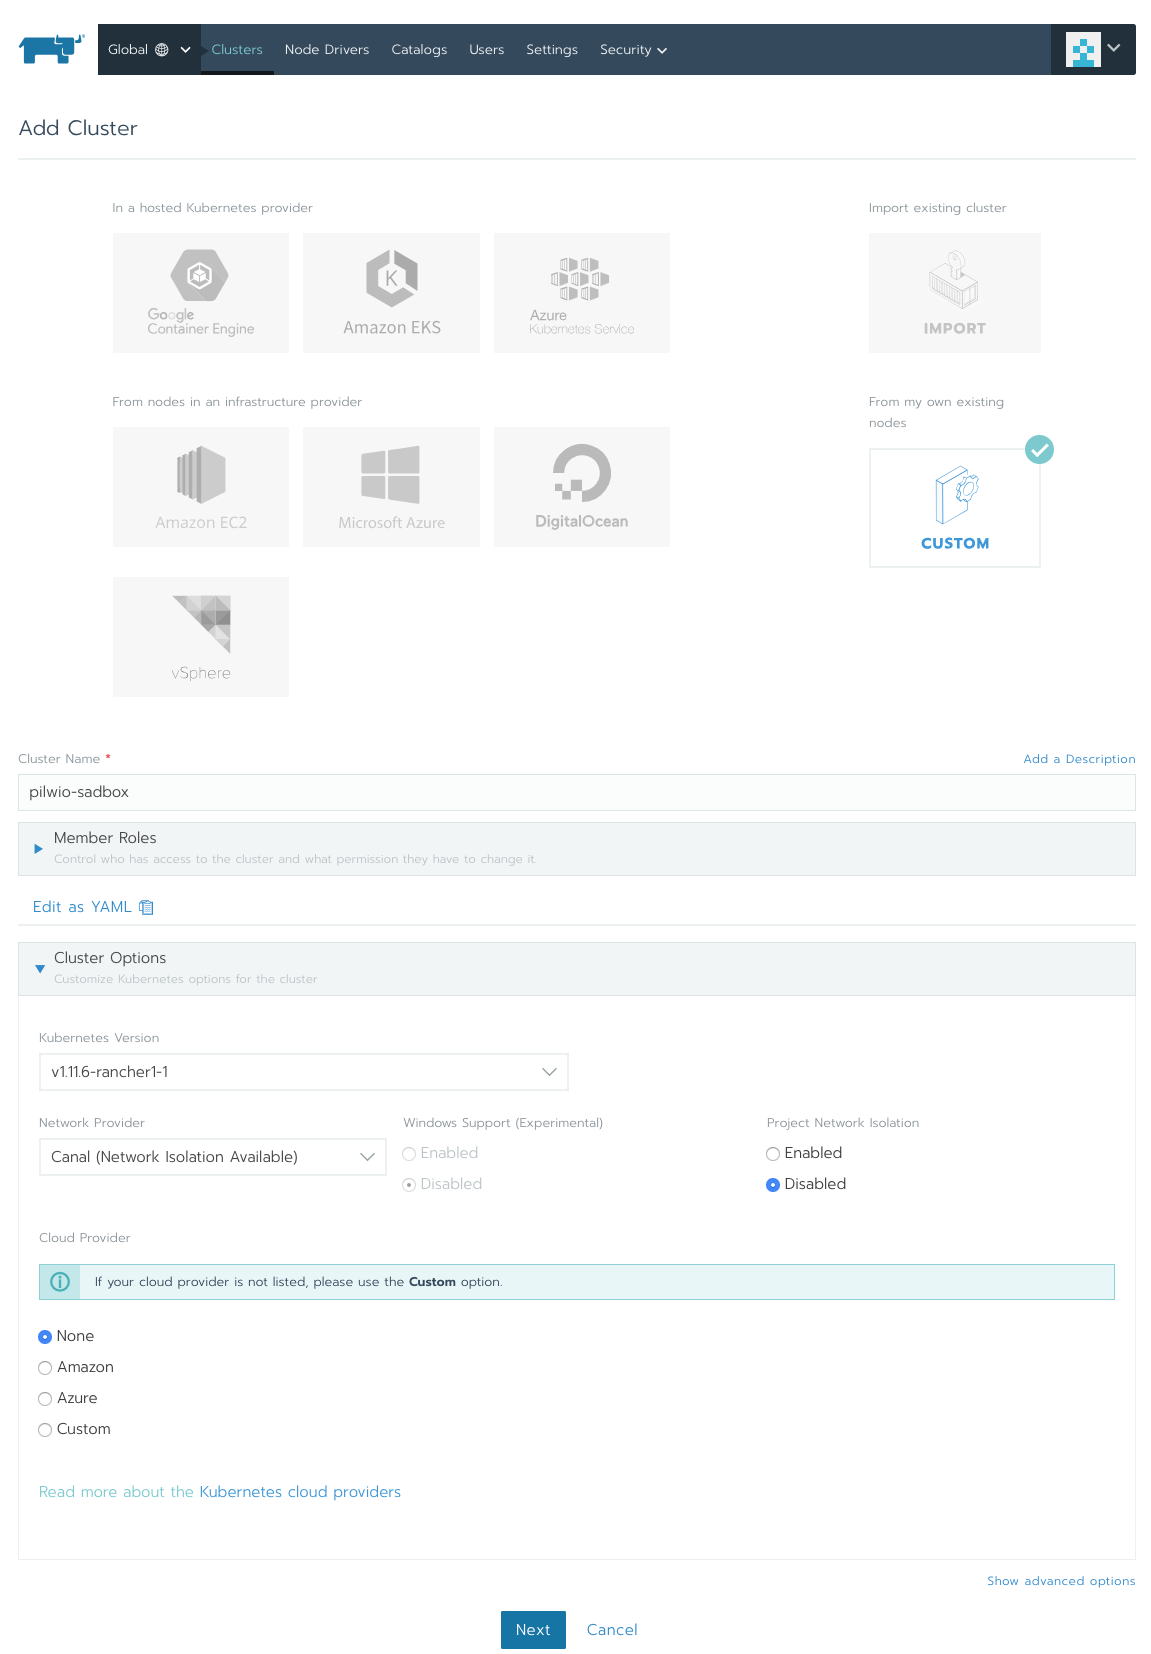
Press the Add Cluster button in the Rancher screen. Select Custom, since we will take existing nodes and give a name to the cluster. I name my cluster as pilwio-sandbox. Now you can select Cloud Provider. As I do not want for now Rancher to create nodes for me, I will select None. Click on the Show advanced options link in down-right corner. In there you can select various options, but I leave these as is for now. Click Next and we go to next screen.
There check options etcd, Control Plane and Worker, so we add node which is capable for all of these roles. Also herewith we can discover nodes with IP addresses and add to cluster. But we will go to section below to add nodes with docker command (marked red in the screenshot above), which installs Rancher host agent container. Just copy the command to clipboard and run in the host to be joined to the cluster.

The command will install Rancher agent in container, it contacts to your Rancher instance and node will be registered there. You should see the green bar like that in the Rancher window now.

This means the node is nicely added to the newly created cluster. Press Done and Rancher will take care of the rest to configure the node. It takes a couple of minutes, so be patient. You can see what are the activities being done. Although the descriptions are red, it does not necessarily mean there is something wrong. If you see it
Add more nodes to cluster
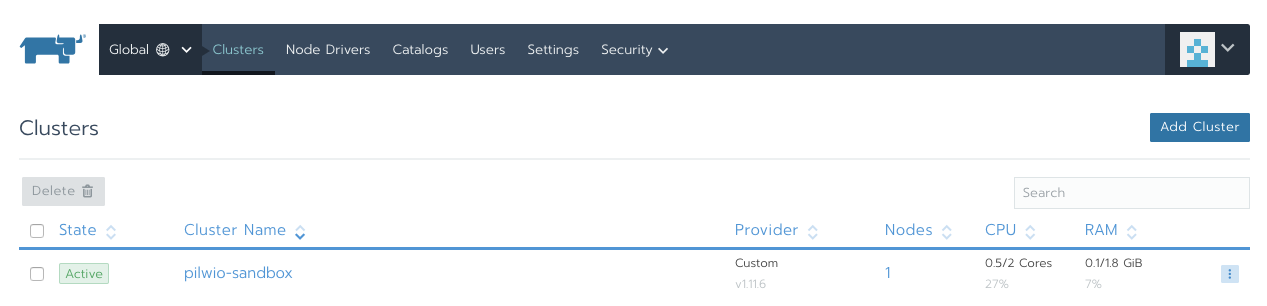
This means we have now single node Rancher deployment with single node Kubernetes cluster. You can install more cluster nodes to make the
Now, since we have already etcd and Control Plane nodes, we can just add Worker node. Make sure you have just Worker selected and copy the Rancher agent installation command from the bottom of the page to clipboard and paste it to the second node to be added to cluster. Again, please make sure you have Docker installed in node. Again as soon as node is added, you will see green message stating that new node is registered. You can save and let Rancher to finalise node registration. It takes a few minutes once it is successfully registered. Same way you can add more nodes to your Kubernetes cluster.
Deploy web application
We have now cluster up and running and now it would be cool to run some applications there. I will deploy a simple workload to run NGINX demo app and expose it to the world. This would be a very simple deployment, rather demonstration and the app will give us some details about the sessions.
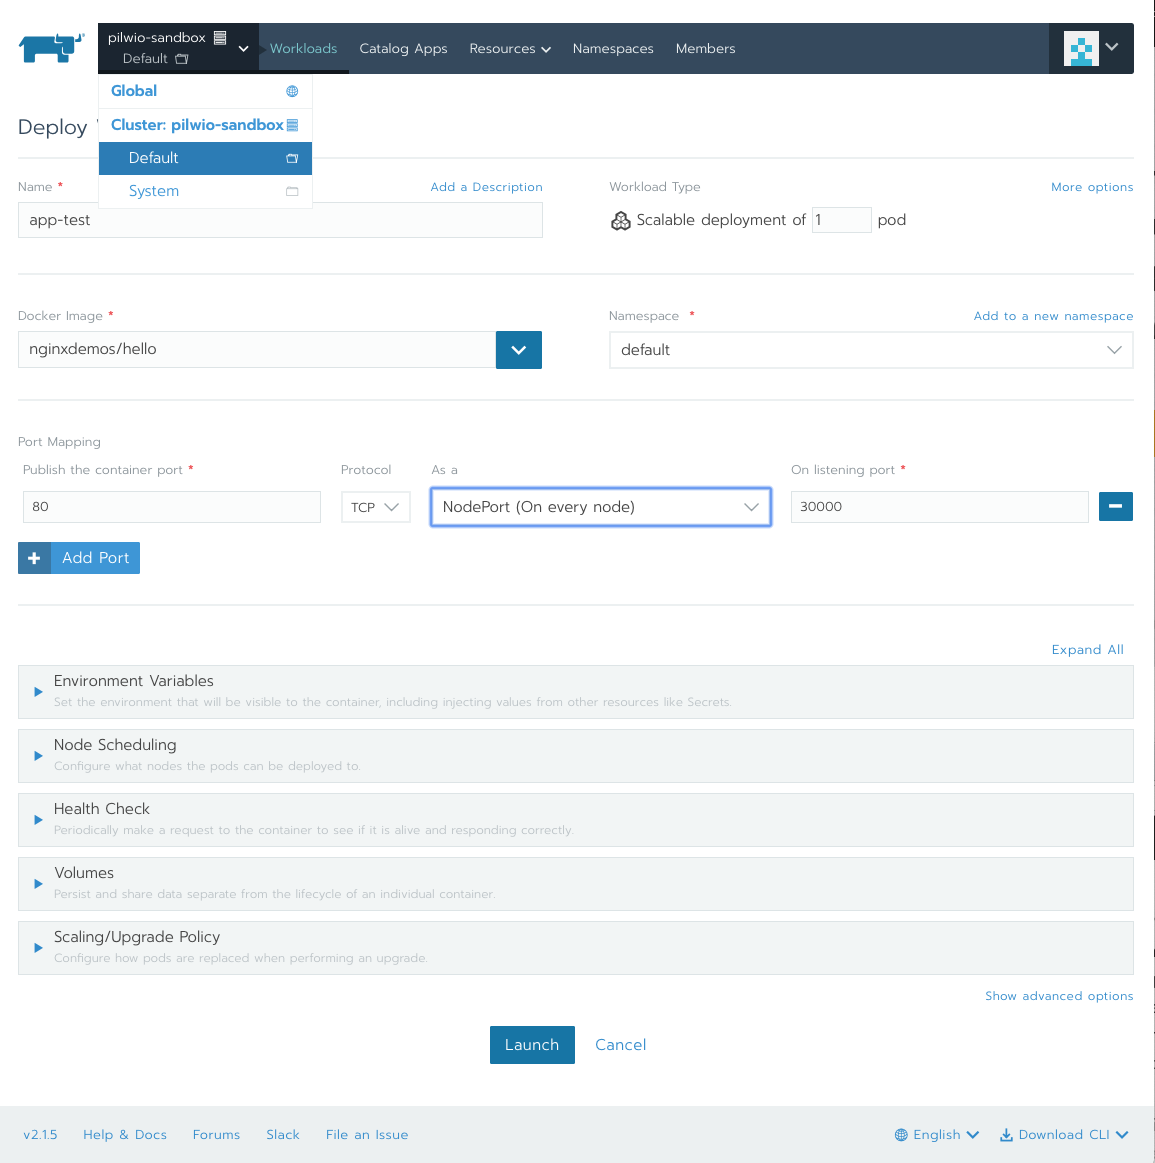
Give a name to your application, I will use app-test. You can select also Workload Type and select how many pods you would like to run there with the service. Lets leave this one as it is now. Under Docker Image type nginxdemos/hello, which is going to be our first single container app. We do not have any other services we need there, so it forms the pod itself. nginxdemos/hello image will be downloaded from Docker online repository. If you want and you have, you can use also your own repository to download images and run in cluste. The container need to be published also. Its internal access port is 80 and I make it available on all nodes at port 30000. We can leave the port selection as a NodePort, as we would like to make the app available on each node it runs at.
There are also lot of other options to change, to customise the pod depending on your development needs. But we leave it as is for now and just launch the pod. When pod is running, we should see its status as active in the workloads summary screen.
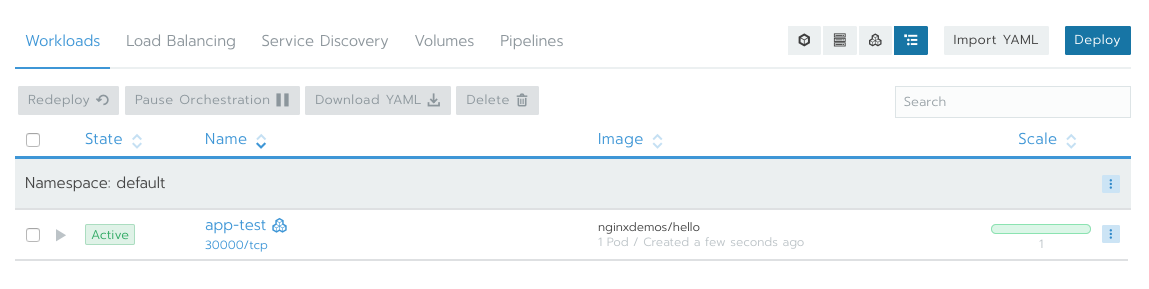
We could see the application running, however for now it would be seen through PILW.IO private network directly. To access the service externally, you’d need to find out on which worker node the service runs and then access to the worker node external IP address to the port 30000. Just click to app-test link and there you will see on which node the application runs.

In example here we see it running on node k8s2, which IP address we can find from PILW.IO portal and then point browser there http://{IP to k82s}:30000 and something like that should become visible:
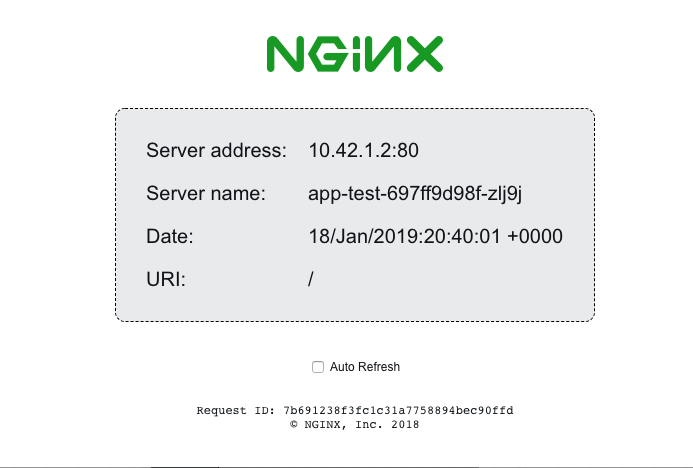
Scaling
When you cluster reaches the limits, you can add more worker nodes. Similarly to previous steps, you can add another node to the cluster. It is easy to resize the cluster and in fact the activity can be automated.
It is a matter of monitoring cluster load – once it is reaching its limits, you just to add a new node and with ease, the cluster has more power to run additional workloads. When the cluster has not enough workloads, you can also reduce the number of nodes by draining and deleting these. It becomes very useful, when you have a workload that needs to run only for
When cluster has enough resources to power more workloads, you can also increase number of pods for your application. This will allow higher traffic due to increased number of application processes. To increase number of pods, go to Default project, edit pod with the three dot icon on the right. Select Edit from there and increase number of Scalable deployment of pods. Hit Upgrade and see what happens. After a little while you can see two pods running app-test service.
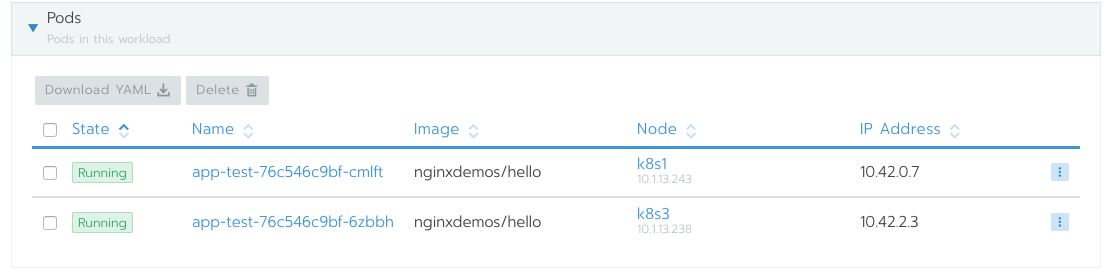
As seen in screenshot above, the pods are running on different worker nodes now. One running in node k8s1 and the other one on k8s3. Adding more pods, will try to distribute the workload evenly across the cluster nodes.
Lets run go live with our app – load balancing
As explained earlier, you can get the application accessed, when pointing browser window directly to worker node and turn to port 30000. The bad thing is with it that if a worker node will be shut down, or app moves to a different
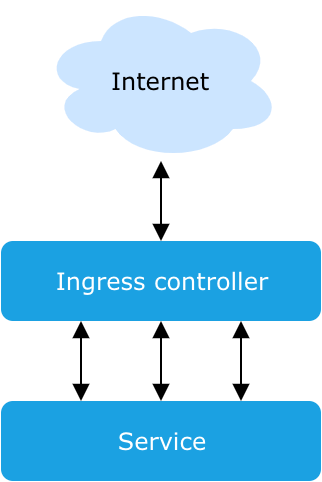
Service runs on many workers and on many pods. Ingress controller redirects the HTTP requests to one of the pods, which is available. Now when one pod or worker disappears, the Ingress controller will redirect the IO to some other worker. Now, lets configure it to our service also and test it out.
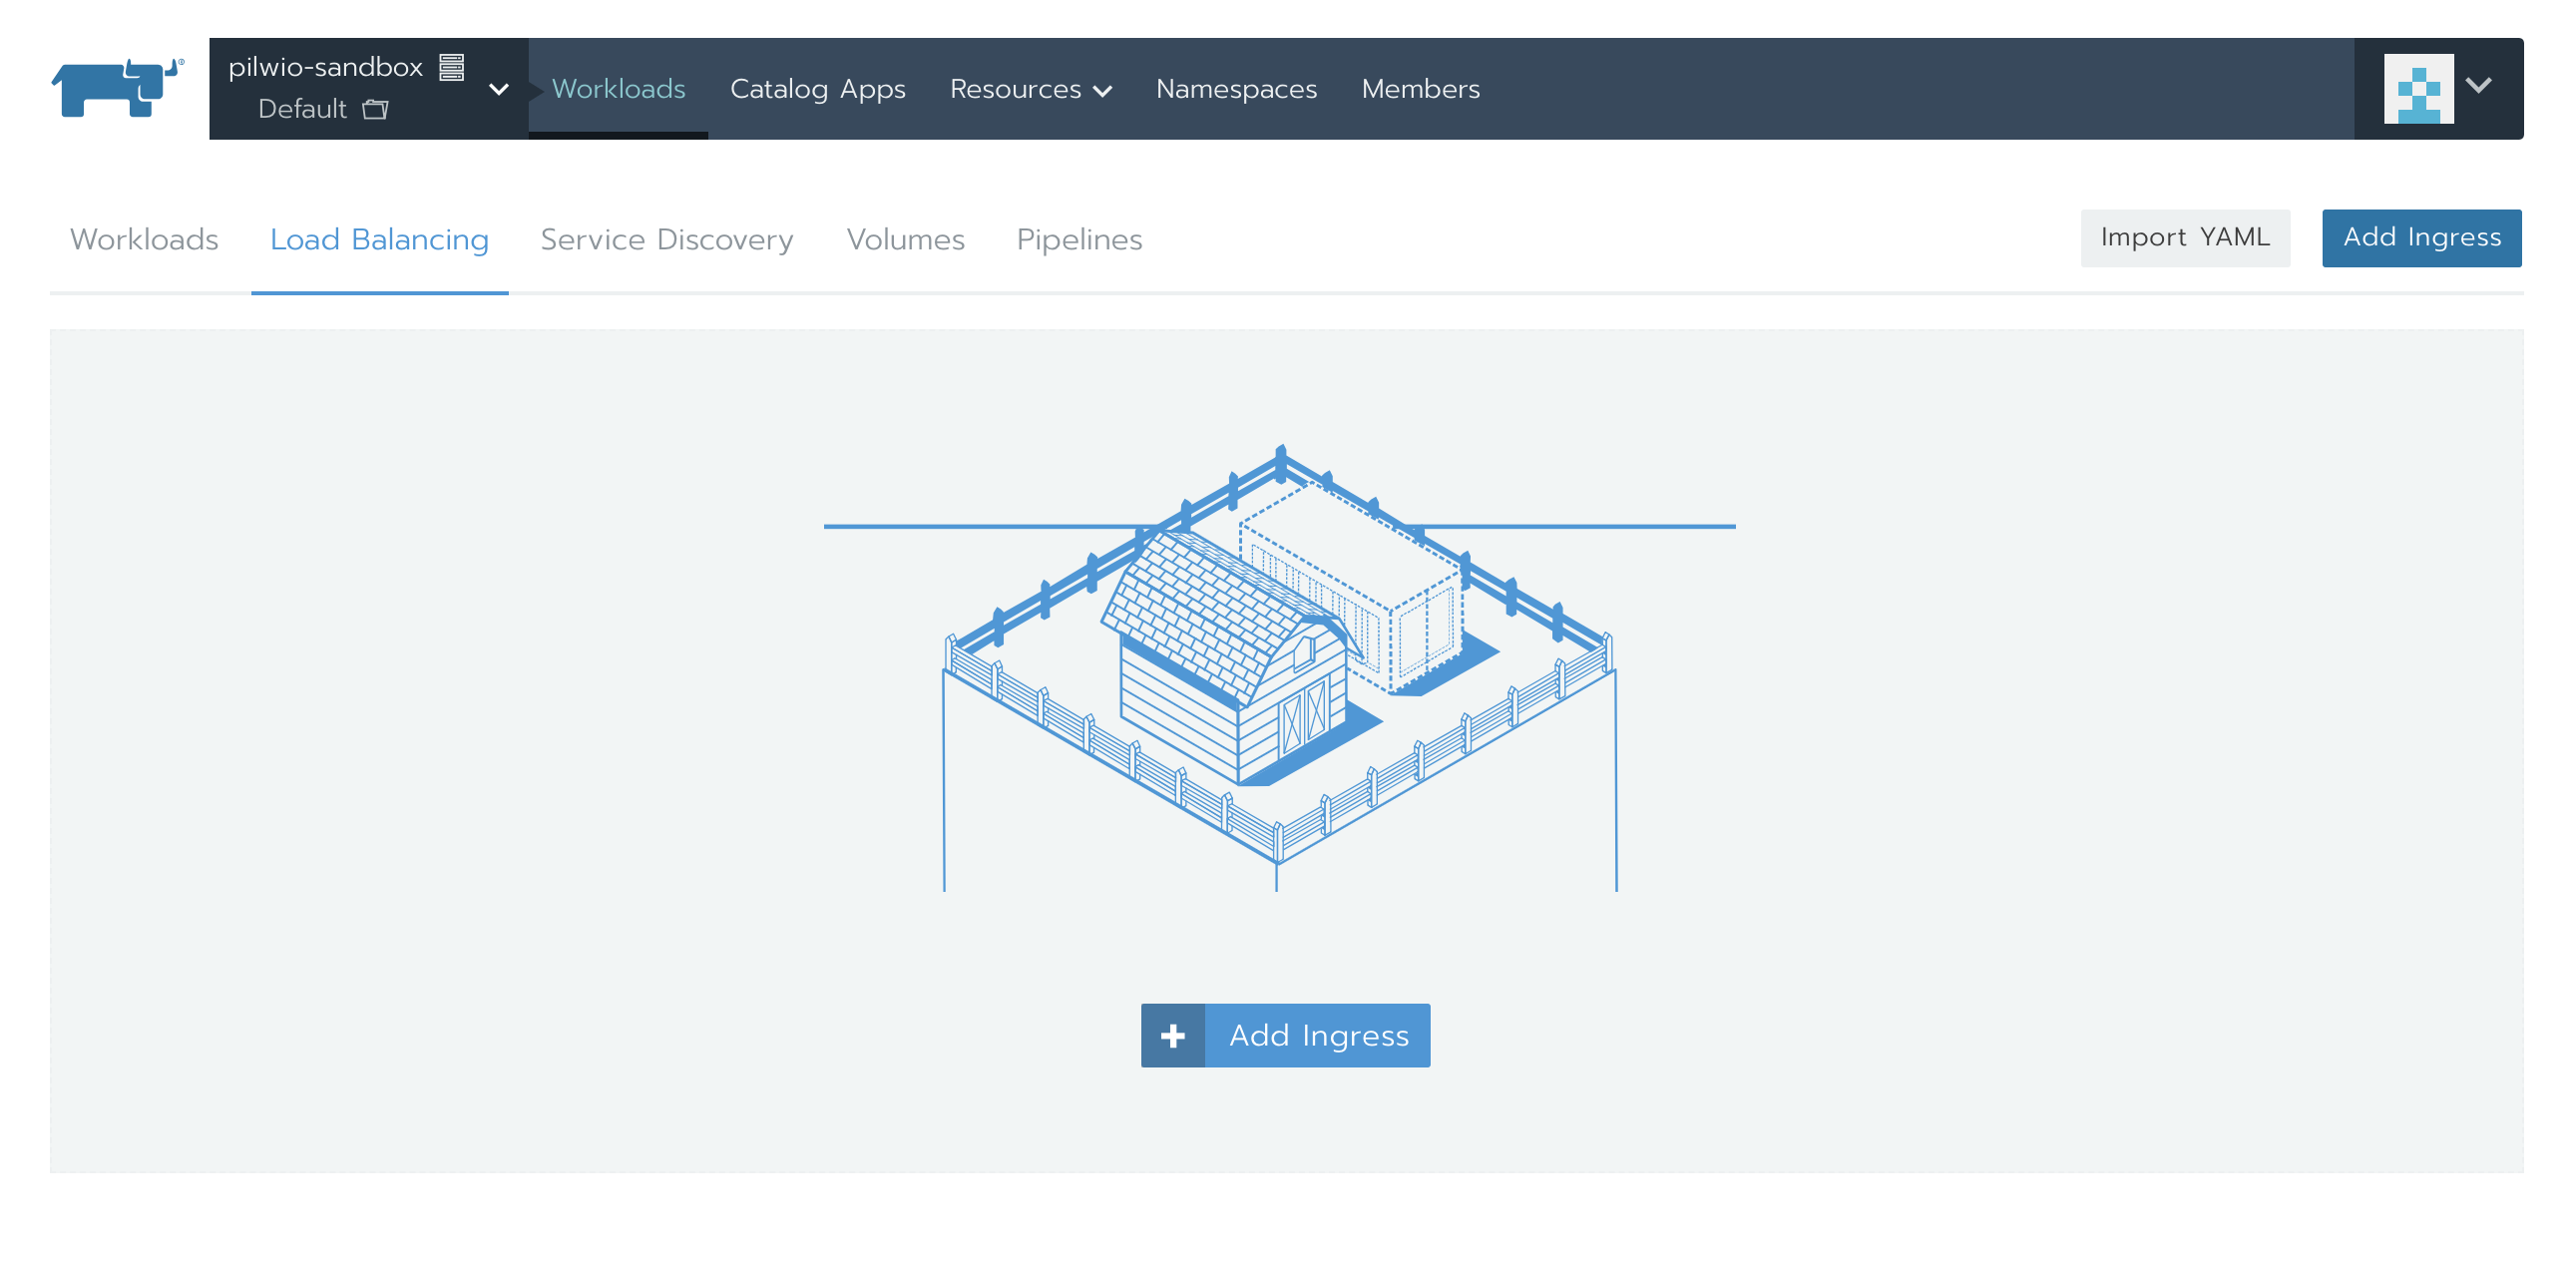
From Rancher menu select cluster and the namespace where your app runs. For me, it runs on cluster pilwio-sandbox and Default project or namespace. Select from menu Load Balancing and click Add Ingress. You will get to following configuration window:
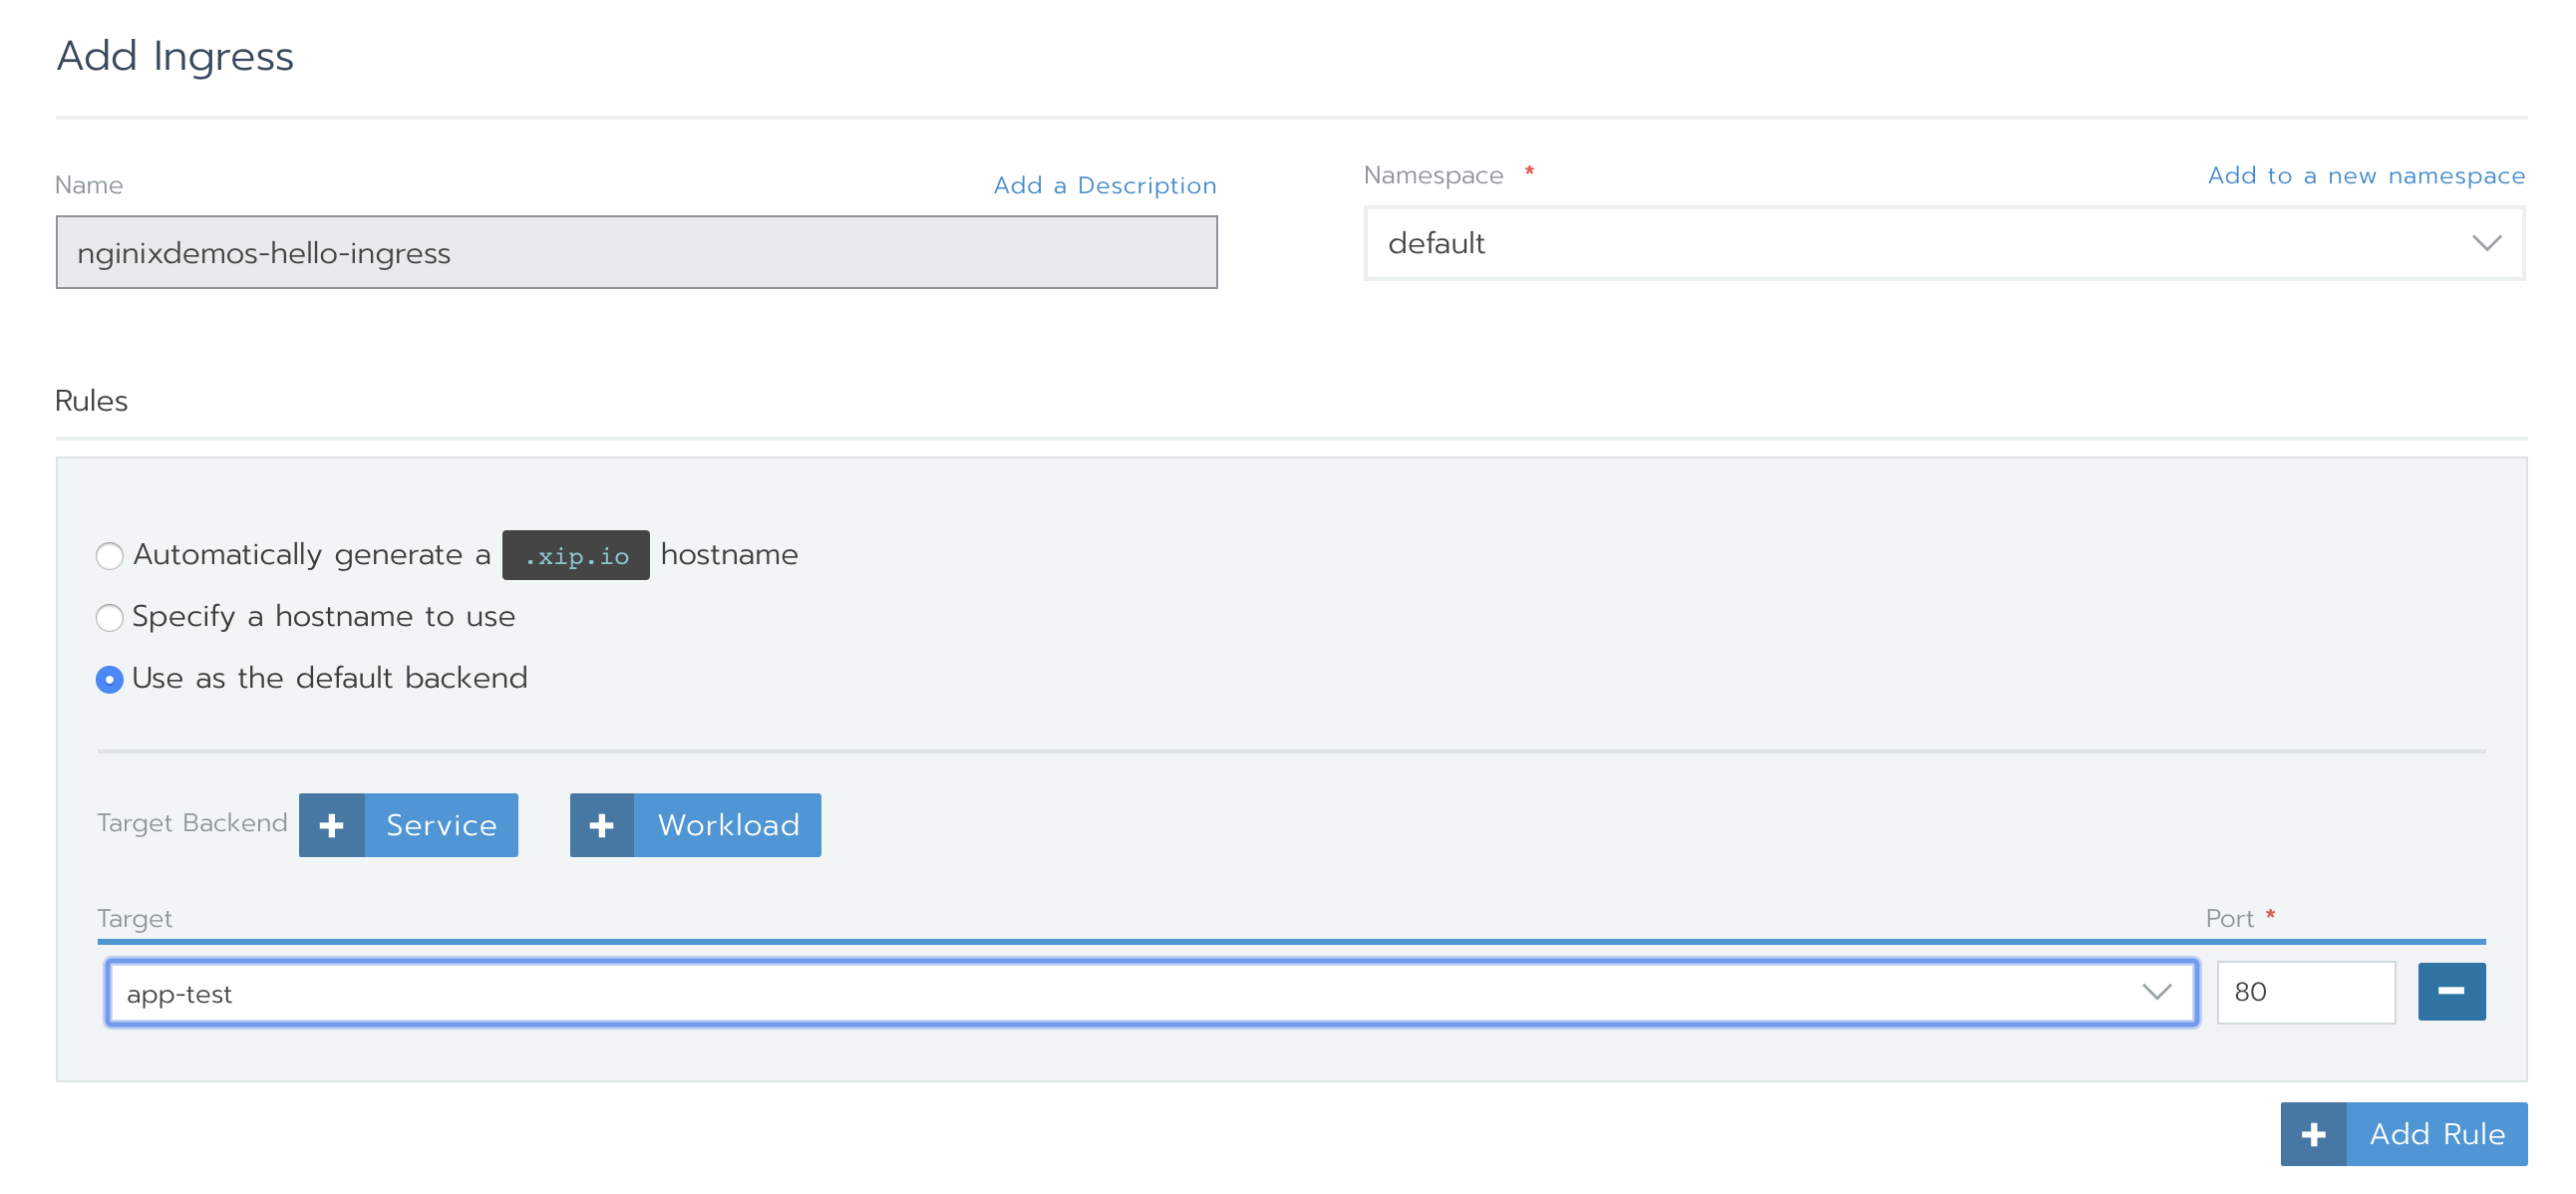
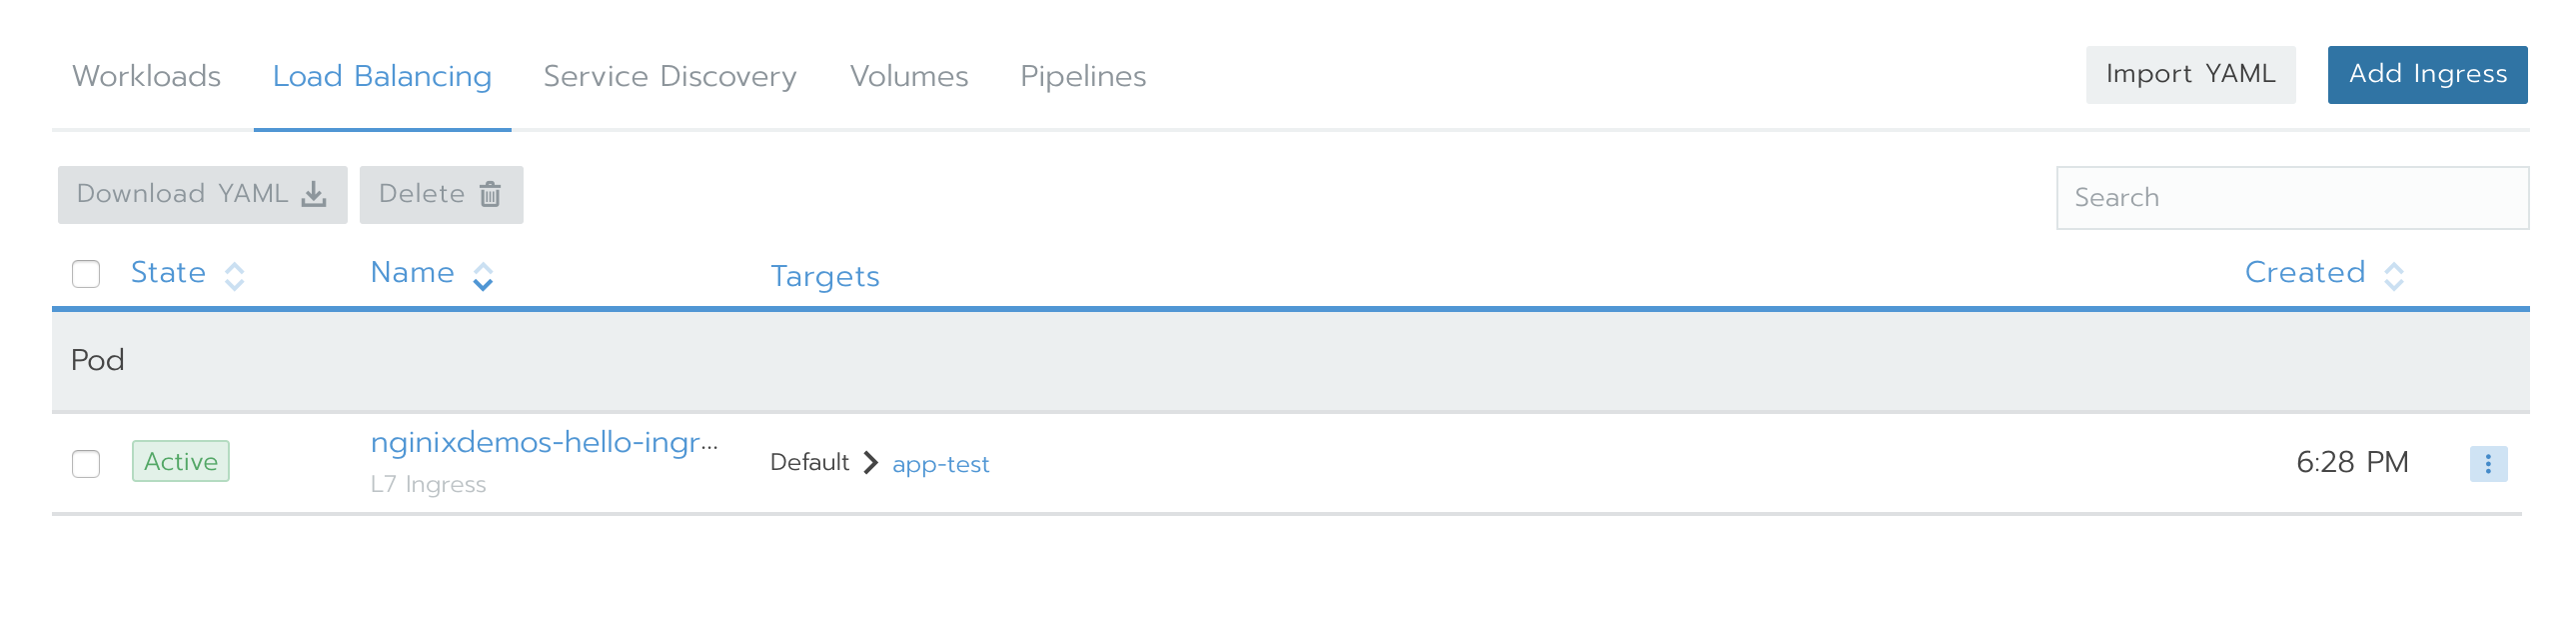
Just give name to your new ingress (I had nginxdemos-hello-ingress), make sure you have namespace dropdown selected namespace where your app runs at. For rules, select Use as the default backend. In Target, select your application, which in my case is app-test, and select Port 80. This is the rule that Ingress will use to redirect the traffic. Click Save and it takes couple of minutes of initialisation. When done, you should see something like:
Now open your web browser and point it to one of the worker nodes PILW.IO external address http://{IP to your worker node}. You shoud be seeing the nginxdemos app page as seen above.
To make sure your app is working as it should and workers are actually changing while being accessed, you can check the Auto Refresh check box. Then you should see server address, server name and down below request ID changing every second. To test if your cluster actually still works, go ahead and stop one of your worker nodes in PILW.IO portal and see what happens. As our installed setup is with single master node, there is not much high availability for the installation. Therefore I suggest to shut down one of the worker nodes.
To increase availability of the cluster, I suggest to have non-even number of etcd nodes and control plane nodes. For enterprise production environment there should be even better HA solution installed, for what you can get guidelines from Kubernetes and Rancher web sites.
Usually no-one promotes his website with IP address. To change it, you need to edit your created ingress and change rule to Specify a hostname to use with name of your website. It can be in example www.yourwebsite.com. You need to have the website configured in DNS system to point to IP address to one of your worker node. You might need to ask some help from the service provider. Or you can ask from PILW.IO support how it can be done.
In conclusion
Congratulations, you did set up your app in DevOps fashion!
The deployed cluster supports DevOps approach to deploy applications and services. Developers can make changes to the system and then start to enable the changed code in live. You can have it also tested before promoting the changes to live. Just have created your services and set in different namespaces or projects. Create YAML files and deploy somewhere else. It is fairly dynamic environment.
You can set up all your applications this way in PILW.IO, having each application deployed as per need in separate name space or same name space. You can monitor the traffic and container infrastructure, to make decision whether you need to deploy more pods to enable more traffic, or add more worker nodes, once your existing nodes are working on limits. As briefly mentioned above, you can scale your environment with new nodes, once you have demand for higher load and give nodes back, when you do not need them anymore. It all can be done without impacting your application availability.


0 Comments
Add Yours →