

In our previous blog post, we introduced Pilw.io Storage Vault and how it can benefit your business. Storage Vault is an object storage that is scalable and highly manageable. It is the perfect data storage method for storing and organising unstructured TBs of data, system backups or any type of archives. With Pilw.io Storage Vault, you can reach your data from anywhere with any device with an internet connection, how cool is that! You can check the other benefits of Pilw.io Storage vault from here.
This step by step guide will explain how to set up your object storage, store and reach files via Cyberduck. Before start using the PILW.IO Vault storage, you need to create your free account and have a valid billing account. Once have that, you can create pilw.io object storage access key and secret key.
Step 1- Locate the Important Information
As for the first step, find important information for you to use your object storage space.
You access key and the secret key are the first important information to look for. You can reach your access key and secret key from the API screen.
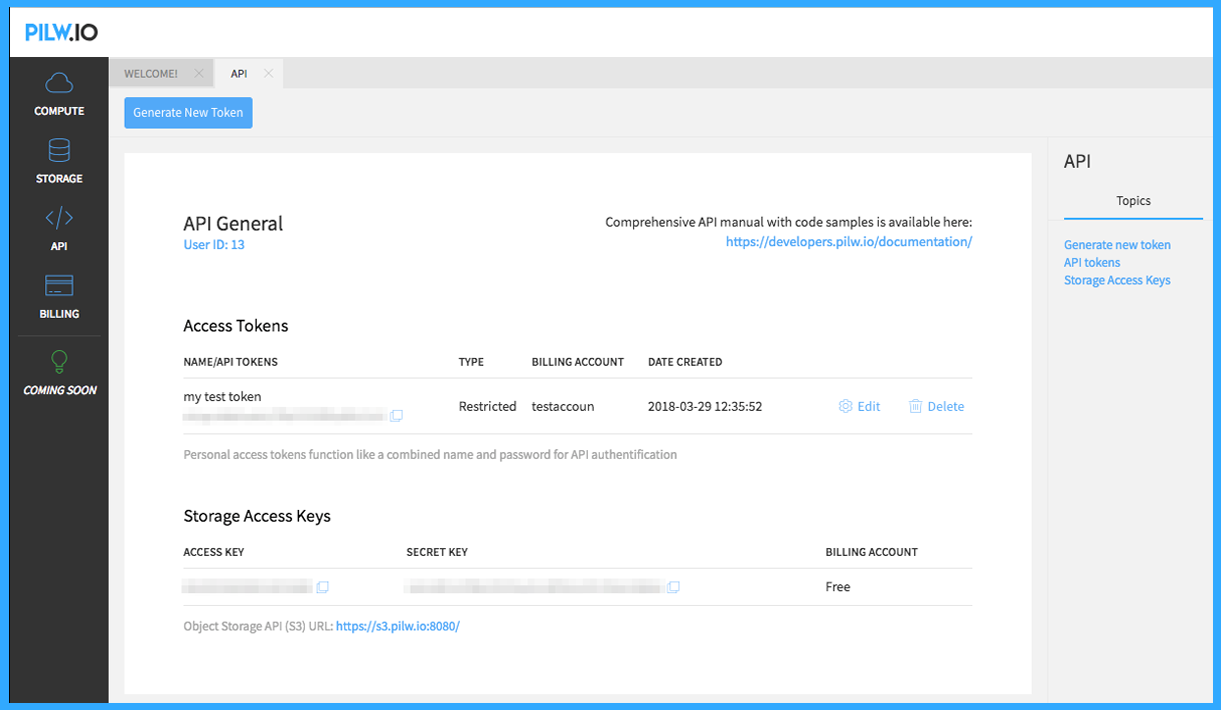
The keys are complicated codes with some characters and numbers – rather complex ones to remember. On a screenshot above, the complicated keys are blurred, but the values you’d need to look for are Storage Access Keys (Access Key and Secret Key).
After finding your keys, the second important information to look for is your Object Storage API (S3) URL. This URL allows you to reach your storage from anywhere with an internet connection on any device.
2- Create Your Bucket!
Now you can go ahead and create your first bucket. There are few ways to create a bucket, but the easiest one is to go select “Storage” from left icon bar. This opens a new tab, where you can create new storages. Once you navigate to the storage page, you will see the option to “Add new storage”. The object storage space you create is called “storage buckets”.
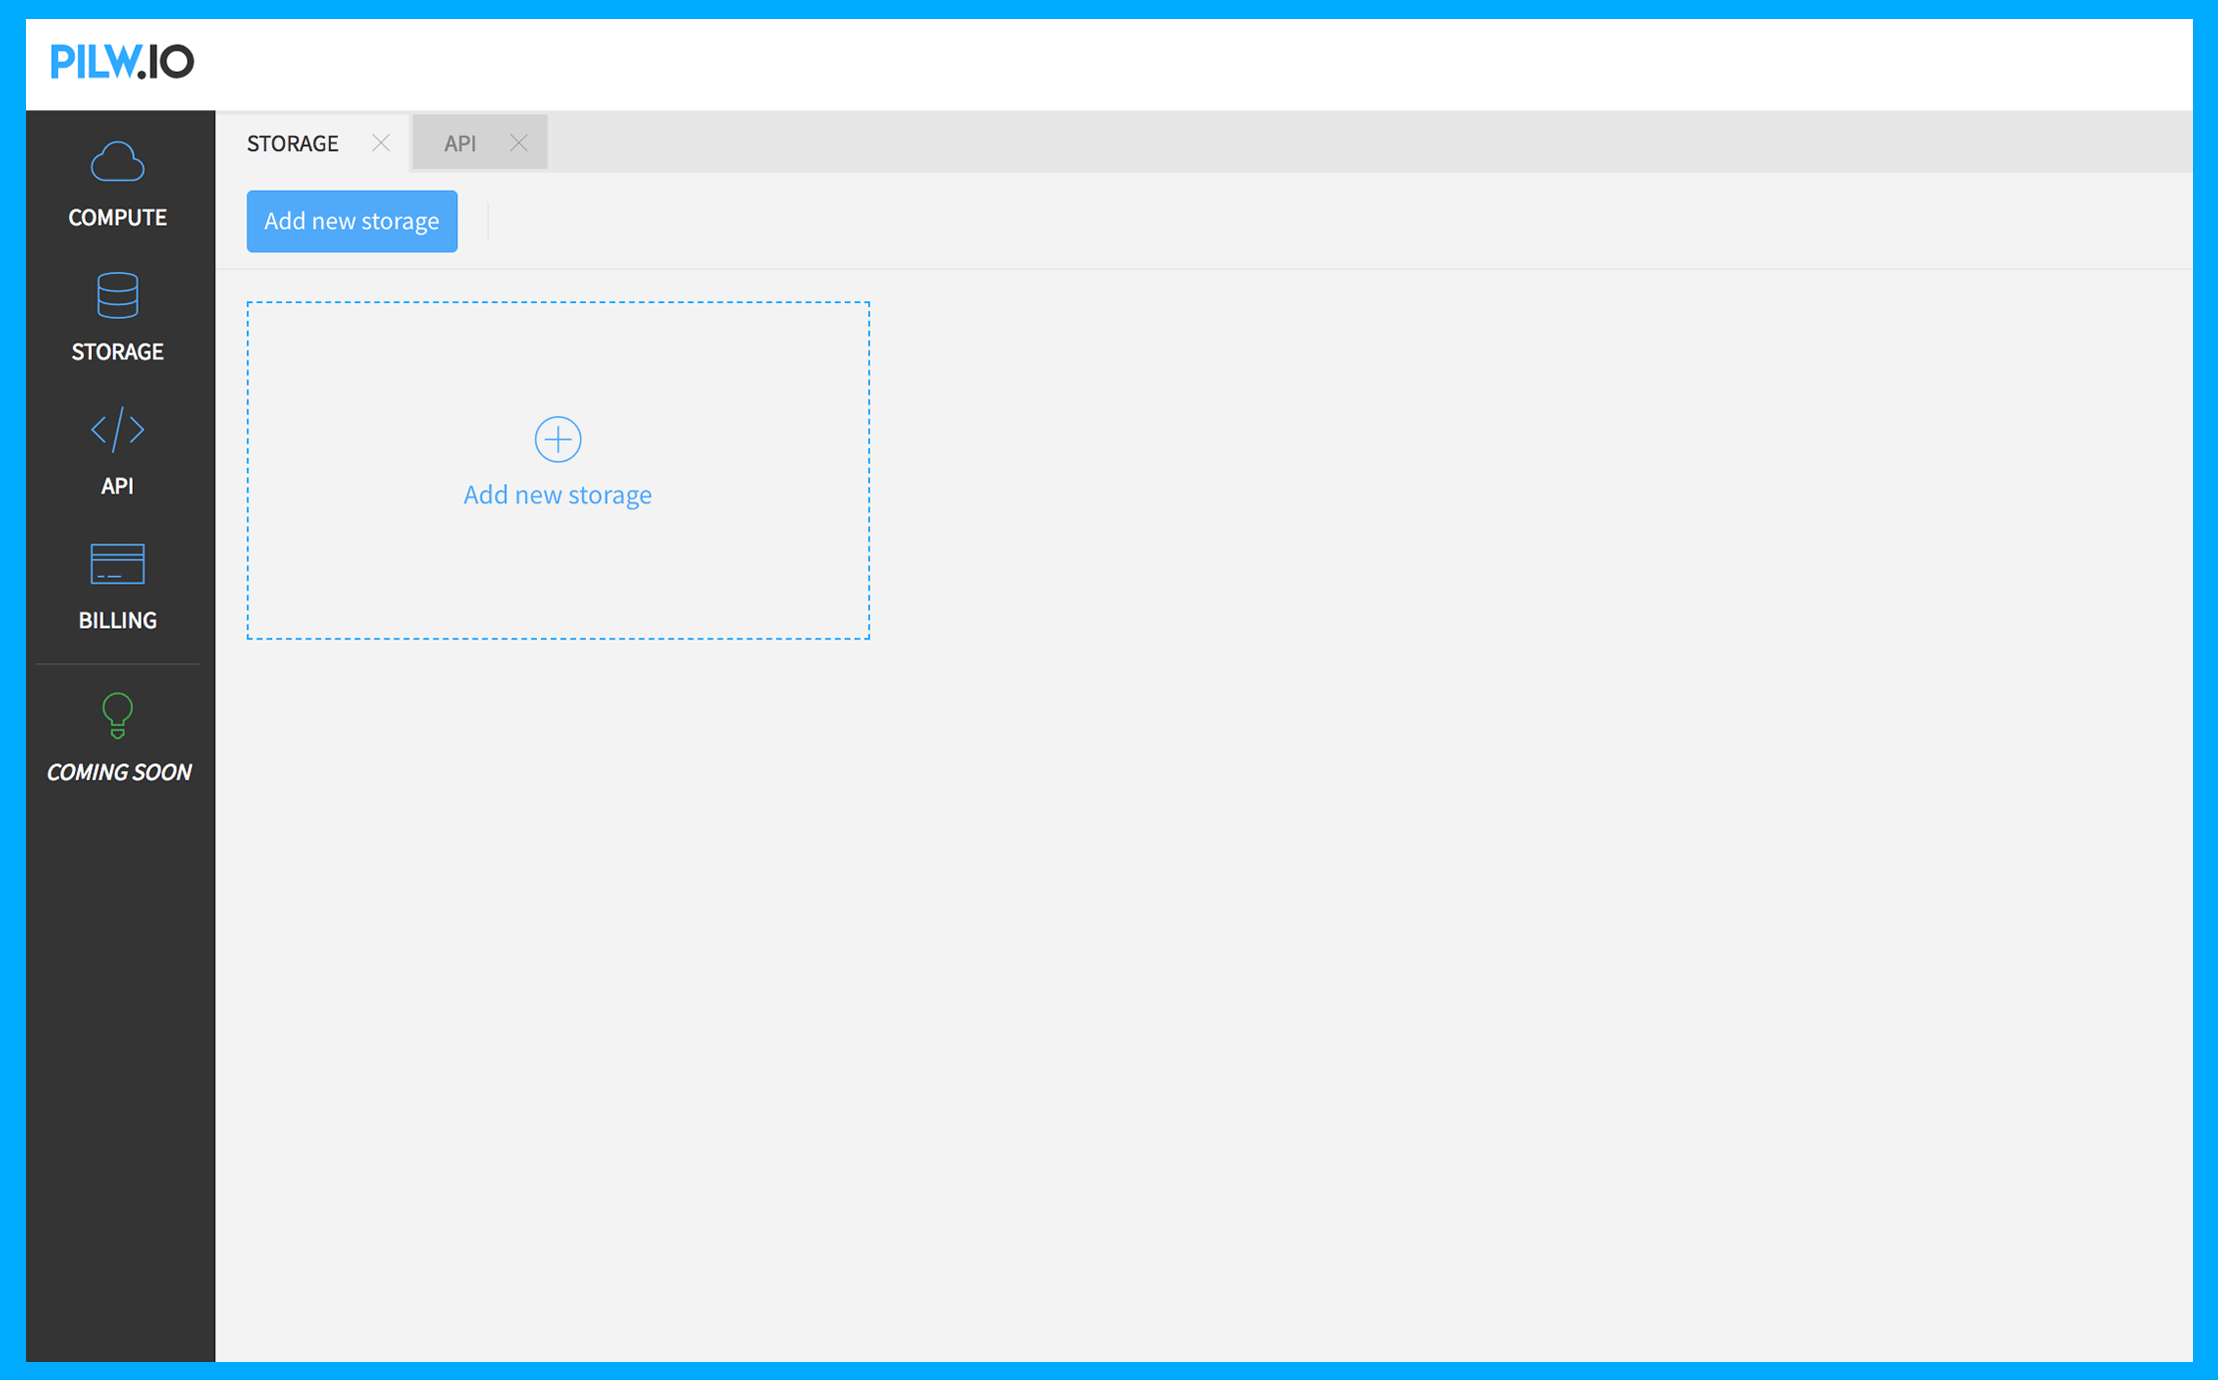
You can always see the status of your buckets such as the number of stored objects or the space available in the bucket from the same page. You can also add buckets as many as you want or delete them any time.
Press “Add new storage” button, to open the add storage dialogue screen. After naming your bucket, you need to select the billing account you would like to relate the bucket with and press on the “create” button. You can connect different buckets with different billing accounts according to your needs.
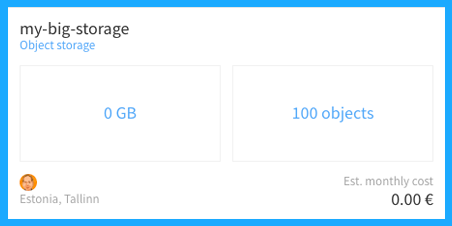
The screenshot below shows a newly created storage, with 0GB in use and 0 objects in it. As an example, we created a bucket named “my big storage”.
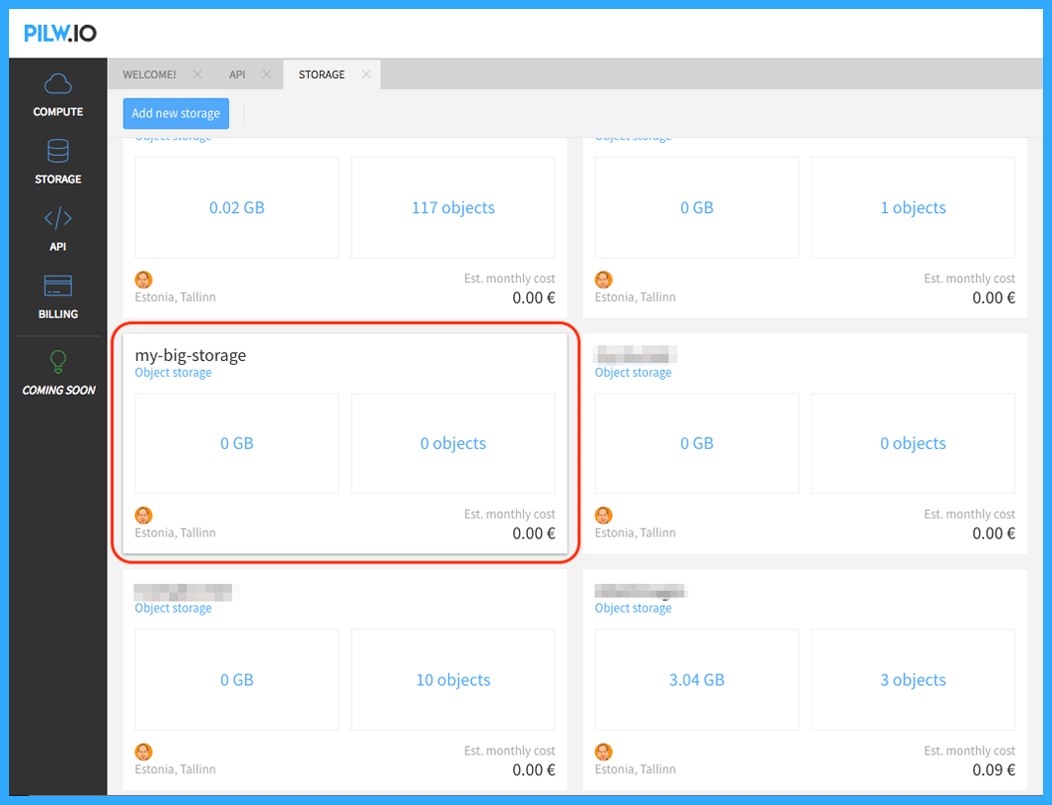
When you name your bucket, the important thing to keep in mind is that the name should be unique within the single userspace. The reason behind that is the storage is accessible from the web with REST API calls. The bucket name is part of the address when you access it. In an example, the bucket we just created will be accessible with address https://s3.pilw.io:8080/my-big-storage. We will discuss that more in our next blog posts.
Funny thing is that the buckets that you create within the storage, will show up in the list of stages at pilw.io portal also. We can test it later on with some file transfer client.
3- Reach Your Bucket
Now you have your bucket ready, you can go ahead and start putting objects in it! There are few ways to use the bucket:
- With a client that speaks S3 protocol language (e.g. Cyberduck, S3Browser, etc.)
- With AWS Command Line Interface command in the command line
- With a program that is built to use S3 object storage (backup software, archiving software)
- The programming languages with S3 supported libraries
- With mobile device client
- Hey, why not – the web browser itself!
- Something else that is not listed here.
For this article, we will take the easiest one first. You can set up the Cyberduck client to access the S3 storage. Start by downloading Cyberduck from here.
Cyberduck is available for Windows and Mac platforms. There are a variety of other clients available supporting the S3 protocol. Some of these do support only AWS own S3 endpoints, but flexibility is to support others is also there.
Once Cyberduck is downloaded and installed, you need to create profile or bookmark. There is a profile template file which you can open with Cyberduck, fill necessary Access Key fields (which you can copy from pilw.io portal API tab, as shown on the first step) and that is it. It would be great to give a good nickname to the connection also, which helps you to remember what server the bookmark connects.
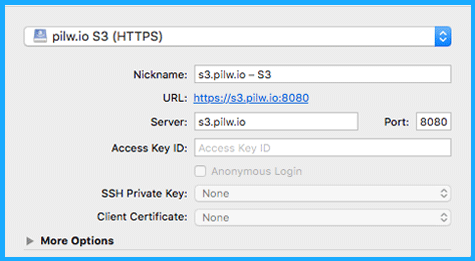
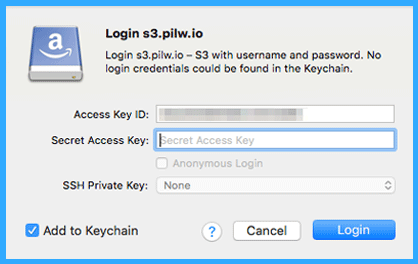
When connecting, Cyberduck will reach to s3.pilw.io and ask for the Secret Key, which again can be copied from portal API tab. Depending on the system you are accessing your S3 storage from, you might be able to save the Access Key and Secret Key combination. This makes easy to access your storage space in the future.
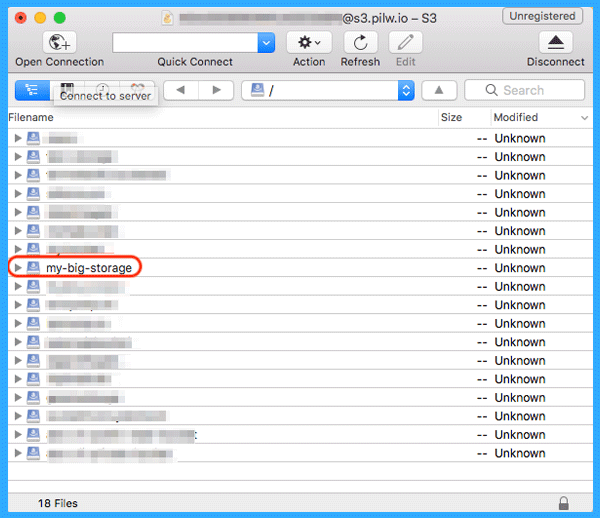
Once you log in, you will see a window that is similar to the screenshot below. In this example, the access has been used for a while, so it shows quite a number of buckets created. But our created bucket is also nicely seen there.
4- Add Object to Your Bucket
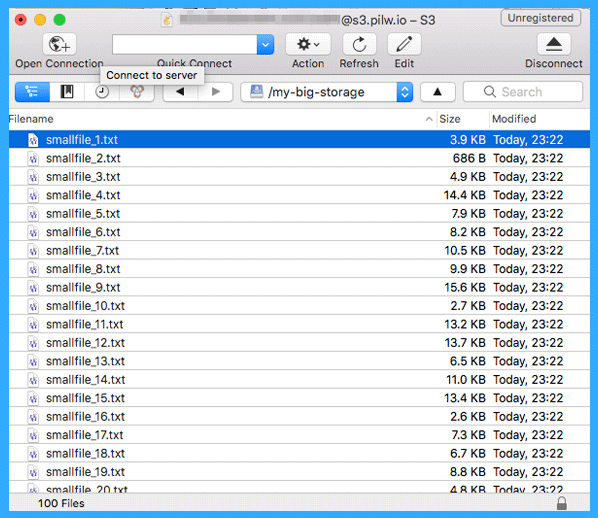
Now let’s add some objects to our bucket! For test purpose in here, we have randomly generated files with various sizes. The files can be just dragged to Cyberduck window and these will be uploaded to the bucket as objects. In the screenshot below, you can see 100 files uploaded to “my-big-storage” bucket.
Now let’s take look back at to our storage in pilw.io portal.
We can see it is showing 100 objects stored in the storage space. These are the 100 files which are copied there with Cyberduck. In this example, there is no cost information because the capacity is not that significant for now. We could create another bucket in Cyberduck and we can test if we can see the newly created bucket in our pilw.io portal.
For that, we need to create a new folder in the root folder of Cyberduck. Let’s name the folder as “my-big-storage2” and copy few files in there. Let’s copy just 8 files.
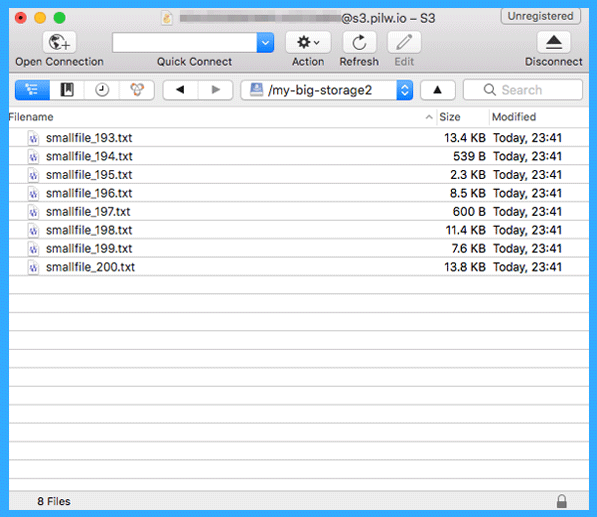
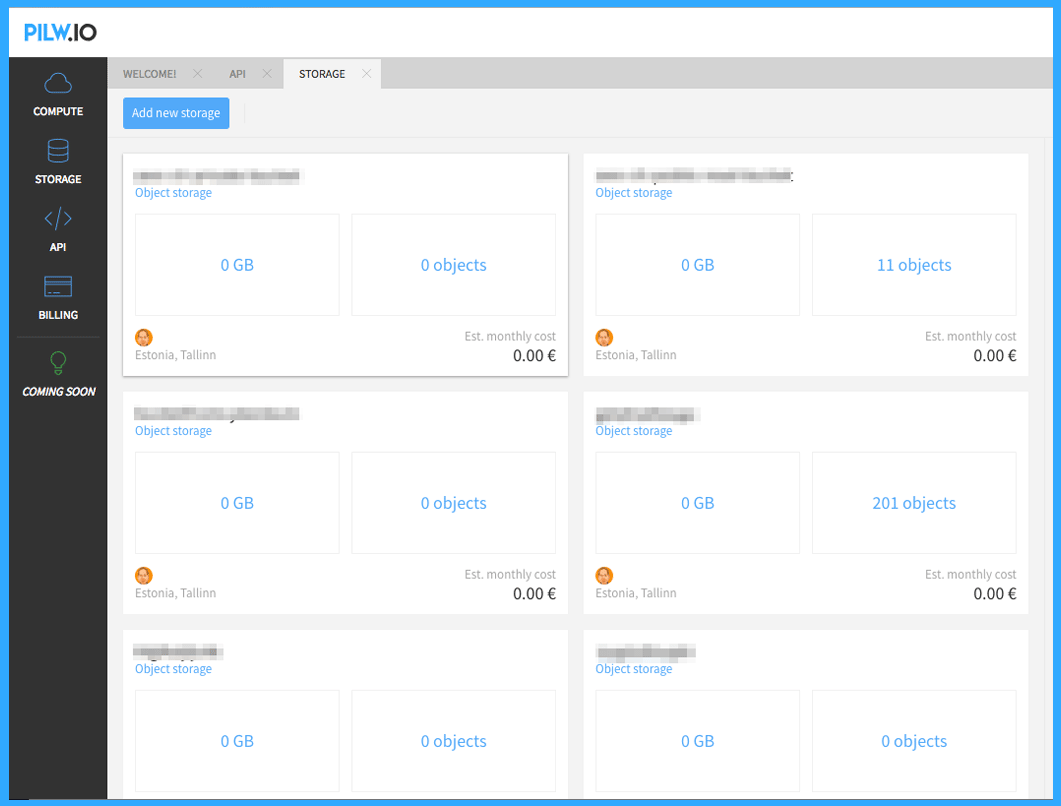
You can see that all of the 8 files are in the bucket “my-big-storage2” now. The screenshot below shows the pilw.io portal with two buckets we created and files we copied as a number of objects.
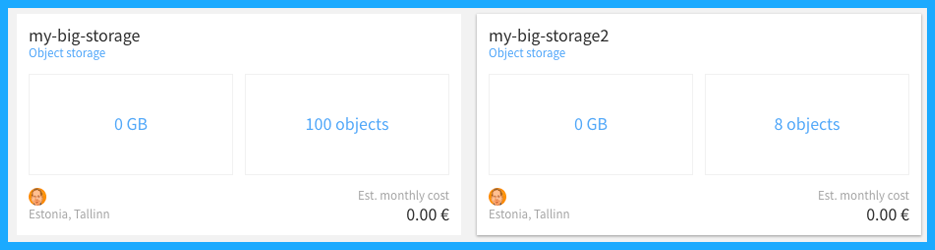
There we have two buckets – side-by-side. One created from pilw.io portal, the other one created from Cyberduck.
This is a very simplified way to use pilw.io S3 object storage. You can use some other tools that enable for example automated backups to consume object storage. The principle of the connections is the same. You would just need to explain the endpoint (https://s3.pilw.io:8080), Access Key, Secret Key and most probably you’d need to describe the bucket name where data can be stored.
In our next article, we will talk about the use case of NextCloud with PILW.IO Storage Vault. Keep following our blog!

0 Comments
Add Yours →